Proxmox Virtual Environment, (PVE) is an open-source hypervisor manager.
Based on Debian and with a modified Ubuntu LTS kernel it allows deployment and management of virtual machines (KVM) and containers (LXD).
Differently from XCP-ng, Proxmox VE includes a web interface and provides a REST API for third-party tools.
It can be downloaded for free at [Link] and if necessary use the USB Imager to create a bootable thumb drive [Link].
Creating a bootable USB for installation:
dd bs=1M conv=fdatasync if=./proxmox-ve_7.1-2.iso of=/dev/sdc
Updating and upgrading:
apt update
apt upgrade -y
apt dist-upgrade -y
In order to avoid error messages about a repo that is not signed (because it requires subscription), comment all lines in the file /etc/apt/sources.list.d/pve-enterprise.list.
Go on your browser to https://192.168.1.103:8006/ and create a new and strong password to the default user root.
CLI COMMANDS
- man qm
- qm list
- qm start 100
- qm shutdown 100
- qm reboot 100
- qm reset 100
- qm stop 100
- qm config 100
- qm set -onboot 1 100
- man pct
- pct list
- pct start 101
- pct shutdown 101
- pct reboot 101
- pct config 101
- pct set -memory 1024 101
- pct enter 101
INSTALLING THE GUEST AGENT
sudo apt install qemu-guest-agent -y
BEFORE CREATING AN IMAGE FROM A VM
sudo rm -rf /etc/ssh/ssh_host_*
sudo truncate -s 0 /etc/machine-id
sudo dpkg-reconfigure openssh-server
IMPORTING A VM
wget http://192.168.1.100:8080/Kali-Linux-2021.4-virtualbox-amd64.ova
tar xvf Kali-Linux-2021.4-virtualbox-amd64.ova
qm importovf 100 ./Kali-Linux-2021.4-virtualbox-amd64.ovf Storage --format qcow2
If the import of the disk (*.ovf) fails, create a new VM manually then:
qemu-img convert -f vmdk Kali-Linux-2021.4-virtualbox-amd64-disk001.vmdk Kali-disk001.qcow2 -O qcow2
qm importdisk 100 Kali-disk001.qcow2 Storage
OTHER CLI TIPS
Wiping a secondary disk from CLI:
wipefs -fa /dev/nvme0n1
dd if=/dev/zero of=/dev/nvme0n1 bs=1M count=1000
udevadm settle
reboot
APPLIANCE MANAGER
pveam update
pveam available
pveam download local debian-10-turnkey-nextcloud_16.1-1_amd64.tar.gz
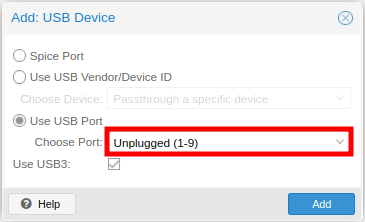
ATTACHING AN USB DEVICE TO A VM (PASSTHROUGH)
For the example bellow I am attaching a Wireless Adapter model AX200 from Intel (WIFI-6).
lsusb | grep AX200
Output: Bus 001 Device 002: ID 8087:0029 Intel Corp. AX200 Bluetooth
qm set 112 -usb0 host=8087:0029,usb3=yes
Output: update VM 112: -usb0 host=8087:0029
OR
Using the Web-UI:
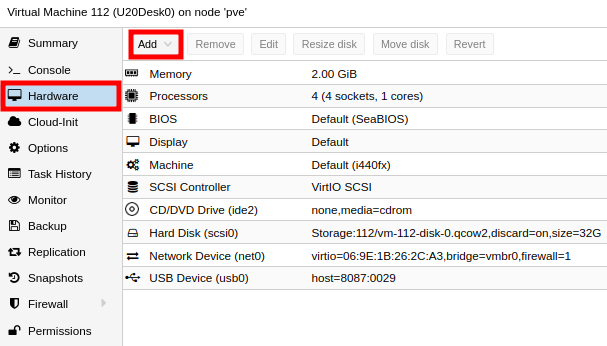
Experiment to find the option that matched better to your needs:

PROXMOX BACKUP SERVER (PBS)
PBS is an open-source backup software VMs, containers, and physical (Debian/Ubuntu) hosts [Link].
After the installation, the web interface of the PBS will be available on port 8007 (i.e. https://10.10.10.10:8007/).
Installing PBS Client on Debian/Ubuntu physical instances:
echo "deb [arch=amd64] http://download.proxmox.com/debian/pbs-client bullseye main" | sudo tee /etc/apt/sources.list.d/pbs-client.list
sudo wget http://enterprise.proxmox.com/debian/proxmox-release-bullseye.gpg -O /etc/apt/trusted.gpg.d/proxmox-release-bullseye.gpg
sudo apt update
sudo apt install proxmox-backup-client -y
Backing up the root of the file system:
sudo su -
proxmox-backup-client backup root.pxar:/ --repository 10.10.10.10:backup1
Backing up with encryption key:
proxmox-backup-client key create backup.key
proxmox-backup-client backup root.pxar:/ --repository 10.10.10.10:backup1 --keyfile ./backup.key
Listing backups and snapshots:
proxmox-backup-client list --repository 10.10.10.10:backup1
proxmox-backup-client snapshot list --repository 10.10.10.10:backup1
Creating an environment variable for the target repository:
export PBS_REPOSITORY="10.10.10.10:backup1"
echo $PBS_REPOSITORY
Mapping a directory from the Host to the Guest CT:
sudo nano /etc/pve/nodes/<NODE>/lxc/<ID>.conf
...
mp0: /HOST/PATH/,mp=/GUEST/PATH,mountoptions=noatime
BONUS
Proxmox officially does not run in Raspberry Pi but Pimox does [Link].
Pimox is an adapted build of Proxmox that was tailored to work on the Raspberry Pi 4.
See the following post with a step-by-step to install, configure, and leverage [Link].
2 Replies to “Proxmox VE and Backup Server Cheat Sheet”
Comments are closed.